

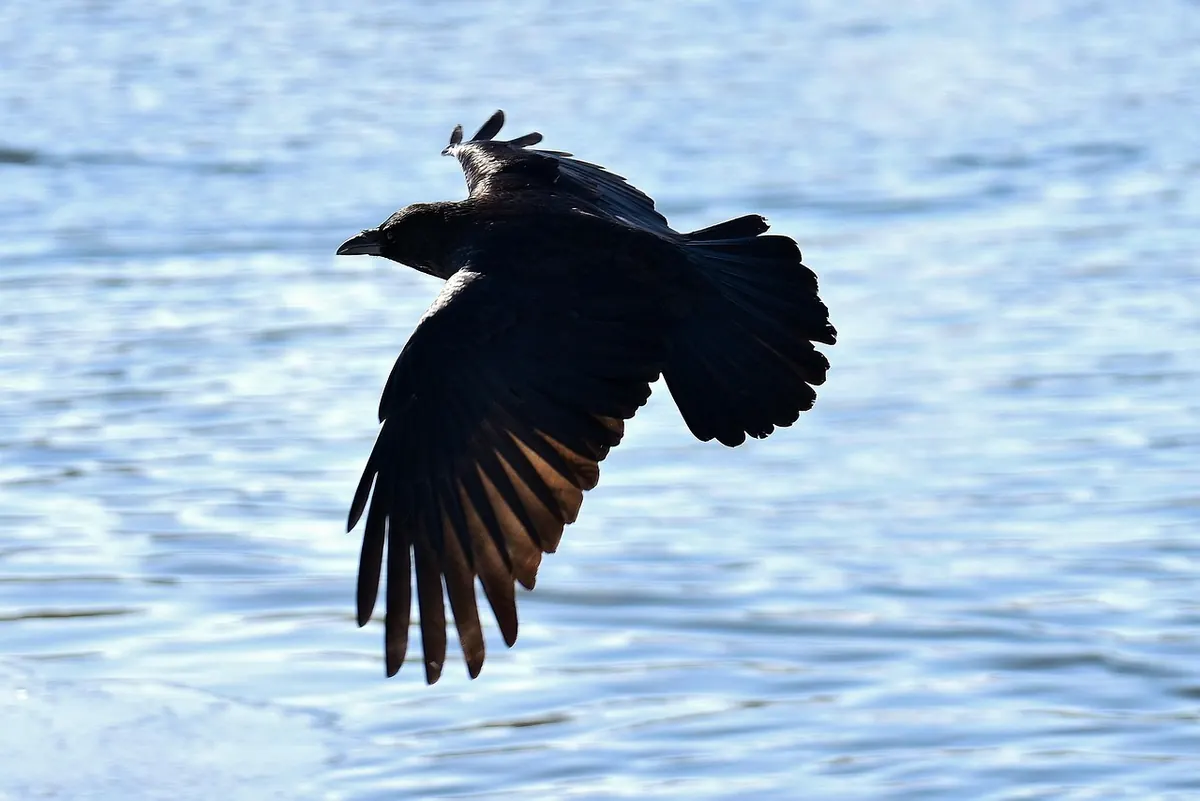
Ravens do not pose. A carrion crow will flap past at head height and hand you a decent frame almost by accident. A raven will drift two hundred feet up, hang in the wind, fold one wing and tumble sideways for no obvious reason, then disappear behind a ridge while you are still hunting for the focus point.
That is the appeal. Get your settings roughly right, and your fieldcraft rather better, and one sharp frame of a raven rolling on a coastal updraught will justify a cold, empty morning.
Shutter speed first, everything else after
For birds on the wing, shutter speed decides whether you come home with a photograph or a grey smudge. The old advice of "1/1000 and above" is a floor, not a target. A raven gliding along a ridge line is usually held sharp at 1/1000 sec if you pan smoothly. Steady flapping flight wants 1/1600. The tumbling, half-rolling display flights that ravens throw in spring, or whenever the wind is up, want 1/2000 or faster — and you should accept the higher ISO that comes with it.
A slightly grainy sharp frame beats a clean blur, every time. If your lens or body has a panning stabilisation mode, switch it on; it helps enormously with a bird crossing in front of you. On a tripod, turn stabilisation off altogether.
Autofocus that can actually keep up
Move to continuous autofocus — AF-C on most bodies, AI Servo on Canon — and take focusing off the shutter button. Set the autofocus to the back button (AF-ON or similar) so the shutter only fires. It feels awkward for a week and then you will never go back.
Which area mode you choose depends on the background. A raven flying towards you against open sky is easy: a wide zone or the camera's subject-detection mode will hold it. A raven crossing a busy hillside of rock and heather is not, and a smaller zone or a single point placed on the head is far more reliable.
Two habits make the biggest difference. Pre-focus on the patch of sky or ridge where you expect a bird to appear, rather than racking the lens from infinity each time. And if your lens has a focus limiter, use it — it stops the motor hunting through its entire range when the bird slips out of the frame for half a second.
Exposing a black bird against a bright sky
This is where most first attempts fail. Your camera's meter sees a large bright sky and tries to render it as mid-grey, which turns the raven into a flat silhouette with no feather detail at all. Add exposure compensation — often around +1 EV, more under a heavily overcast sky — and check the histogram rather than the back of the screen.
Expose for the bird. Let the sky do what it likes. Shooting raw gives you far more room to pull detail out of dark plumage afterwards, and underexposure is much harder to rescue than a slightly blown cloud. Deliberate silhouettes are a perfectly good picture; they just need to be a decision rather than an accident.
British light from October to March is mostly flat grey, which is soft and flattering but very low in contrast. Black feathers merge into one another. When the sky is featureless, get closer, fill the frame with the bird, and leave the landscape out of it.
Light direction and where to stand
Where you position yourself relative to the sun matters as much as any menu setting. Sun roughly behind you gives front lighting: good feather detail and a bright catchlight in the eye. Thirty to forty-five degrees off your shoulder is the sweet spot — enough light on the bird, enough shape to the wings.
Side light is what reveals the iridescence in a raven's plumage, that shifting blue, purple and green sheen across the mantle and wings. It is the reason ravens photograph differently from crows, and it only shows when light rakes across the feathers rather than hitting them head on.
Shooting into the light is not a mistake if you want a rim-lit frame or a silhouette against a bright sky. Just expose for the sky and accept the bird as a shape.
Fieldcraft: read the ridge, the wind and the bird
Ravens fly on moving air. A ridge, cliff edge or hill shoulder facing into the prevailing wind is a flight path, and standing on one puts birds at eye level or below — which gives you cleaner backgrounds and pictures you simply cannot get by pointing a lens upwards at empty sky.
Check the wind forecast before you leave the house and pick your hill accordingly. Then work through the approach:
- Walk slowly, stop often, keep your profile low against the skyline.
- Pick a spot where birds are already passing and settle there. Do not chase.
- Stand still. A stationary figure is far easier for a wary bird to ignore than somebody shuffling along a path.
- Wait for the bird to come to you, and let it fill the frame rather than cropping later.
Ravens are wary but curious, and they have excellent eyesight. Learn the flight: slow, deep wingbeats, a long wedge-shaped tail, and a call like a plank being twisted — you will often hear one long before you see it.
All wild birds, their nests and eggs are protected by law in the UK, and ravens nest early, sometimes from late winter. Keep a generous distance from any active nest site, avoid lingering on approach lines, and do not use recorded calls to pull birds in near nests.
Settings to start with
- Mode: manual, or shutter priority if you would rather the camera handled the rest
- Shutter: 1/1600 sec as a baseline, 1/2000 for display flights
- Aperture: f/5.6 to f/8 — wide open can be soft at the edges
- ISO: auto, with an upper limit of 3200 to 6400
- Focus: continuous, back-button, wide zone against sky, small zone against land
- Drive: high continuous, but fire short bursts of three or four frames
- Format: raw, so you can lift the shadows
- Lens: 300mm or longer; 400–500mm is comfortable on a ridge
Practise on crows, then go looking
Crows, jackdaws and gulls are easier to find and just as good for practising your panning, your tracking and your exposure compensation. Spend a few sessions on them until following a bird through the viewfinder at 1/1600 feels automatic. Ravens are commonest in the uplands and along the coast — Wales, Scotland, the Lake District, Devon and Cornwall — and winter and early spring are the best months, with the leaves off and birds more visible as they move around.
Weather-seal your kit or carry a cover. Rain in the forecast is not a reason to stay in, but a damp camera is a reason to go home early, and cold mornings eat batteries, so take a spare in a warm pocket.
Get one good frame
You will throw away most of what you shoot, and that is normal. Ravens move unpredictably, the light changes by the minute, and the difference between a keeper and a delete is often less than a tenth of a second of timing.
So set your shutter speed, check your compensation against the sky, find a ridge with wind on it, and stand still for longer than feels sensible. A hundred frames of nothing followed by one raven rolling sideways at eye level is a good morning's work.
Photo: Alexas_Fotos / Pixabay
Related posts
More stories you’ll love reading